MDT
Metering Data Transceiver with Remote LCD Display
Standard and MAX Range Systems
Product Overview
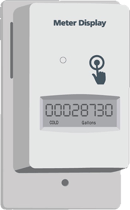
The Display MDT from Tehama Wireless combines our MDT transceiver with a remote LCD display to provide the easiest and most accurate way to comply with tenant meter access requirements in California and elsewhere. The LCD screen displays the consumption for 60 seconds when the button is pushed.
Our Display MDT is available in two radio technologies, our original Standard system and our MAX System. The Standard Range is our original, first generation system, which we continue to fully support and maintain. Both are powered by two AA Lithium batteries with expected battery life up to eight years. The MAX Range transceiver goes three to four times as far inside multifamily structures compared to our Standard system, while still meeting battery life expectations. The Display MDT is installed in the tenant space and wired to the meter.
The Display MDT comes in multiple versions: Single or Dual pulse, Single or Dual Encoder, and Pulse + Encoder. The initial meter read and count factor, along with units and Hot/Cold designation are programmed into each MDT. Newer models have built-in Bluetooth and are programmed via our Mobile App. Older units require a USB cable or a Bluetooth dongle to program. Once configured, the LCD display will show the same consumption value as on the meter face. All programmed parameters transfer to the DCAP for seamless integration into the data provided by the CIT and daily reports.
The Display MDT has a specialized enclosure with a standard sized wall plate back piece that mounts to a standard 1-gang electrical box for a professional looking installation.
The unit is powered by two lithium AA batteries providing over eight-year battery life under typical conditions. A Display Only version with no RF function is also available which will operate for over ten years under typical conditions with the two lithium AA batteries.
The unit is NTEP certified, #16-013A1. California Weights and Measures accepts the NTEP certification.
Specifications
| Inputs Options | Pulse signal from electric, run-time, gas or water meters Encoded protocol, Neptune or Sensus compatible meters Internal temperature sensor |
| Maximum Cable run | 150 feet for Pulse units, 24 AWG wire twisted pair 150 feet for Encoder units, 24 AWG wire twisted pair |
| Radio | 902 – 928 MHz; FCC Certified; Open field range up to 10 miles* |
| LED | Indicates RF network connection status |
| LCD | Displays meter count value and units, activated for 60 seconds by button push. Display always on for Display-Only models. Dual pulse unit alternates display between Hot and Cold readings Units supported: Gallons, Cubic Feet, KWh, Liters, m3 |
| Operating Environment | -20 to 145 degree F, up to 90% RH, non-condensing. |
| Power | Two AA Lithium batteries (included) |
| Typical Battery Life | Up to 8 years @ 50º to 90º F, reduced at extreme temperatures Display-only function: 10 years @ 50º to 90º F |
| Dimensions | Gang Box Case: 4.5” x 2.75” x 1.2" |
| Warranty | Five years. For more detailed information, please visit our warranty page. Note that` the warranty does not cover batteries. |
*Actual range may vary depending on installation location and topography.
Models
| Standard System | Model Number | Description |
|---|---|---|
| Single Pulse MDT | TW-165B-P | Single pulse input counter, one-hour interval data, no on-board memory |
| Dual Pulse MDT | TW-165B-PP | Dual pulse input counter, one-hour interval data, no on-board memory |
| Single Encoder MDT | TW-165B-E | Single encoder input counter, one-hour interval data, no on-board memory |
| Dual Encoder MDT | TW-165B-EE | Dual encoder input counter, one-hour interval data, no on-board memory |
| Dual Encoder + Pulse | TW-165B-EP | Remote display MDT with Encoder Register input and Single Pulse input, one hour interval |
|
MAX System |
Model Number | Description |
|---|---|---|
| Single Pulse MDT | TW-175B-P | Single pulse input counter, one-hour interval data, no on-board memory |
| Dual Pulse MDT | TW-175B-PP | Dual pulse input counter, one-hour interval data, no on-board memory |
| Single Encoder MDT | TW-175B-E | Single encoder input counter, one-hour interval data, no on-board memory |
| Dual Encoder MDT | TW-175B-EE | Dual encoder input counter, one-hour interval data, no on-board memory |
| Dual Encoder + Pulse | TW-175B-EP |
Remote display MDT with Encoder Register input and Single Pulse input, one hour interval |
|
Remote Display-No Radio |
Model Number | Description |
|---|---|---|
| Single Pulse Display |
TW-105B-P | Single pulse input remote display, no radio function |
| Dual Pulse Display |
TW-105B-PP | Dual pulse input remote display, no radio function |
| Single Encoder Display |
TW-105B-E | Single encoder input remote display, no radio function |
| Dual Encoder Display |
TW-105B-EE | Dual encoder input remote display, no radio function |
*: Adequate repeater coverage is required for guaranteed delivery.
Other combinations and sensor inputs are available by special order. Please contact Tehama for details.
Wiring Instructions
Dual Pulse MDTs

Encoder (Sensus/GWF)

Pulse + Encoder (Neptune)

Installation Instructions
The new version of our Display MDT now has integrated Bluetooth for simplified programming using our Tehama C2 Phone application. Programming from the CIT is not supported with these newer devices; however, the CIT can still be used with earlier versions of our Display MDTs. Programming is required to configure the display with the proper Count Factor, Units, and, for dual input units, the hot and cold designation of each meter. See App Note Non-BlueTooth Display Programming Instructions.
Once configured, the tenant activates the Display MDT (D-MDT) by tapping the button. The D-MDT will display the meter value for 60 seconds, including the fixed 0 digits if the meter is 10 or 100 units per pulse resolution.
For dual input units designed for co-located hot and cold metering, the display will toggle between the hot and cold values every five seconds. Pushing the button while the display is on will also toggle between the hot and cold displays.

Configuration
Programming with Tehama C2 Application (For New Bluetooth Models):
Configuration of the unit is now done using the Tehama C2 ![]() application.
application.
- Install the Tehama C2 app from the Apple App or Google Play store.
- From the factory our D-MDTs are powered off. Turn on the MDT by pressing the button for about three seconds, releasing only when you see the LED blip off briefly.
- Set the MDT in Bluetooth mode by pressing the button twice.
The LCD will display ![]()
*Note that on the early versions of our dual-pulse display MDT, the "---BLUE---" display may turn off after 5 seconds however the Bluetooth radio remains operational.
You now have three options to configure the D-MDT:
- If you have a TW-105 Remote Display, continue to Step 4.
- If you have a D-MDT that has previously been commissioned, skip to Step 5.
- If you have a new D-MDT you can simultaneously configure and commission the D-MDT. This provides an easy way to collect the Radio of each MDT without the need for a bar code scanner. To do so, please skip to Step 6.
4. To simply configure a TW-105 Remote Display unit:
Open the app, login and click on the 3-dot at the top of the Site list screen. Select "Display MDT. Confirm that you do want to have access to the MDT and skip to Step 7.

5. To configure a D-MDT that has previously been commissioned:
Open the app and connect to the Site then click on the MDTs zone. Search or the device you want to configure. In our example simply searching for the last 2 digits “8e” of the Serial Number brings up the MDT we want to configure. Click on the row.

In the sensors area click on the Bluetooth icon and skip to Step 8. If you need to update location information you can hit the 3 dots to bring up that screen.

6. To configure and commission a new D-MDT:
Open the app and connect to the Site, click on the MDTs zone and then on the + sign on the Devices screen. Select Add a Bluetooth Device and Confirm.

The MDT has now been commissioned to the Site. Select Yes in the next screen if you want to enter location data. Enter the desired data and Select Save.
Regardless of whether you enter location data, the next screen will ask if you want to configure the display. The MDT should still be displaying "---BLUE---". If it’s been more than five minutes since Step 3, you will have to turn on the Bluetooth radio again. Click Yes then skip to Step 8 in this document.

7. If the MDT is not showing in the Bluetooth devices screen, verify that the device is in Blue mode (Step 3) and click on Scan until it shows up. Click on Connect. And Connect again in the DMDT Config. Notice that the LCD now displays ![]()

8. Configuring the sensors:
Sensor Type will be either Pulse Totalizer or Encoder. If the unit is a dual display D-MDT, two side by side panels Sensor 1 and Sensor 2 will appear. Click on the Sensor input you need to configure.
As shown in the screenshots below, you can configure the following four parameters:
- Initial Meter Reading (IMR). For Pulse Totalizer inputs you can set the IMR. This value should be the full value shown on the meter face in Gallons or Cubic Feet including any fixed zeros. Encoder meters do not need an IMR as the D-MDT reads the meter register directly. You will not see an IMR field for Encoder D-MDTs.
- Units can be set to Gallons or Cubic Feet, kWh, m3, or Litres.
- Type can be set to Hot, Cold, or none (blank)
- Count Factor (CF) can be set to any value including fractions (such as 7.48052 to convert a CF meter to show Gallons on the D-MDT). The most common values are: 1, 5, 10, 50, or 100.
Click on Save when all settings have been entered for one or both sensor(s).

When correctly setup, the D-MDT Display will match the meter face. For example, if the count factor is set to 100, the display will add two fixed zeros to the D-MDT display such that the display units match the meter units.
The IMR value you enter should be exactly what the meter shows, including any fixed zeros. In other words, enter the full reading in Gallons or Cubic Feet. If the meter is 10 gallons per pulse but the meter shows 1 gallon resolution on the wheels, enter all the digits. The CIT will automatically truncate the value based on the Count Factor setting you select.
*Note: Due to regulatory compliance issues, D-MDT units will NOT zero their pulse count if the button is held for 10 seconds, unlike our regular MDT units. However, any update to a Pulse D-MDT WILL zero the pulse count so a new IMR will always be needed. For the same regulatory reason, the D-MDT can never be turned off via the button (pull the batteries to turn off).
Please note the following:
- While you are still able to update these configuration fields in the CIT, the D-MDT sends its Configuration settings every 24 hours and will overwrite anything you enter in the CIT. Therefore, it is very important that the settings you program into the Display MDT are correct as they cannot be changed later remotely. Again this is required for regulatory compliance.
- In California, some inspectors may need to certify the D-MDT installation and seal the D-MDT with stickers covering the communication port.
The D-MDT display, as well as the value shown in the CIT and in daily reports, will use this formula:
Initial Meter Reading + ( Count Factor * MDT Count )